Mushroom logs are a great way to incorporate fungi into your home scale or hobby enterprises. They can be placed around a garden bed or stacked in shady areas of the garden. Logs are a reliable and hardy way to grow wood eating species such as shiitakes and oysters, and are great for home-scale gardeners.
In this video we show you how to inoculate logs with medicinal reishi mushrooms in your garden. It's a great way to decompose logs and add organic material to your ecosystem as well as grow medicinal mushrooms that have been used in Traditional Chinese Medicine for 4,000+ years. We are joined by Carter Humphrey from Central Texas Mycological Society and the Myco Research Station at Circle Acres. STEPS
If you are in Austin, you can sign up to get recycled mushroom blocks for your garden. If you are not from Austin, find a mushroom farm in your area.  Feb 12 - 19 Transplant or Leafy Greens and Cereals We hope you have all your plants tucked in as we approach the New Moon and this Arctic blast. As we are approaching the First Quarter and are in Waxing Crescent, it’s a good time to plant leafy greens and cereal grains but we recommend you start some seeds indoors if you have a plant light set-up. If you already have seeds planted, they can handle a freeze, but hold off on transplants until the freezing temps have passed. We were inspired by Brie Arthur's talk on gardening with Grains this last Monday and included oats in our list. According to the Texas A&M extension service, oats should be planted in the spring between February 10 and March 15. While oats are typically grown in the north, they are grown in Texas for feed and forage. More recently, the San Antonio, Texas company MagiFoods began growing oats in Texas for human consumption! Oats have the deepest taproot of all the cereal grains so “sow your wild oats” in an area you want to prepare for growing later in the spring/summer. Their deep tap roots will scavenge for nutrients and companion planting with peas, will make a complete cover crop. If you missed Brie Arthur's talk, you can catch it on our YouTube Channel. Here is a list of leafy green plants and cereal grains that are recommended for transplanting or direct seeding. During the waxing of the moon (the period extending from the day the moon is new to the day it reaches its fullest point), the moon pulls moisture upwards. Seeds do well during this time because moisture is available at the surface of the soil. It’s always best to try to transplant and seed-in with the coming moisture, but hold off until after the freeze. SEED-IN
SEED-IN or TRANSPLANT
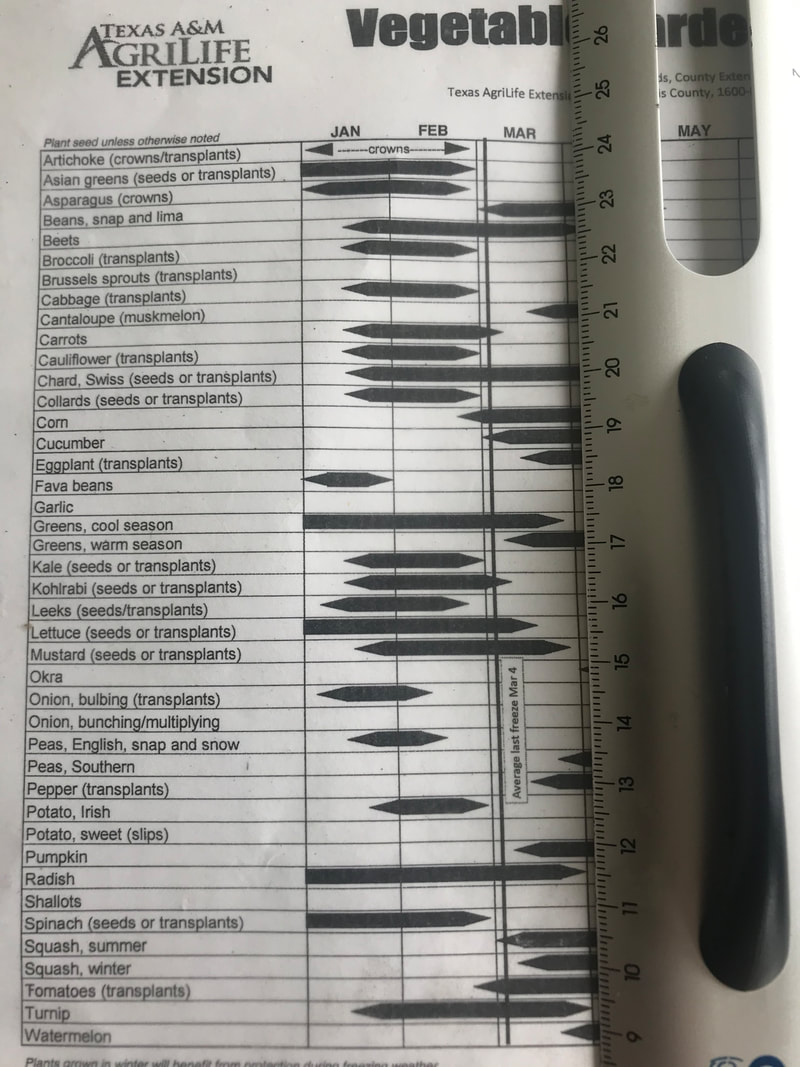
For more ideas on Ornamentals, Perennials, and Herbs, visit the Central Texas Gardener and The Natural Gardener lists online. Download the Texas A&M Extension Planting Chart and Varieties Chart at AustinOrganicGardners.org. This video will show you how to grow oyster mushrooms on straw bale in containers. This video series is in partnership with the Central Texas Mycological Society. MATERIALS NEEDED:
GET MUSHROOM SPAWN FOR FREE Many times mushroom farms have used sawdust blocks that have grown mushrooms once, and then end up getting tossed in the waste stream. Check with your local mushroom farm to see if you can help them reduce waste and use the spawn in your organic garden. If you are in Austin, we are collaborating with a new local mushroom farms to help keep used mushroom blocks out of the waste and help get them into gardens around Austin and building healthy soil! The mushroom blocks are for free but you can also support our mission of helping the crew that is making sure they stay out of the waste by making a donation or becoming a member. GROWING STEPS
STEP 1: Drill Holes around the bucket: If your pots or buckets don't have holes in the side, make a few for drainage and for the mushrooms to emerge from. STEP 2: Soak substrate for 2 days. Soak substrate for 2 days so it becomes nice and hydrated. Then drain. Oyster mushrooms are very robust and can do great on unpasteurized substrate regardless if it’s cleaned. STEP 3: Sterilize your container. Wash with soapy water and then with rubbing alcohol . STEP 4: Mix the spawn and substrate. Mix spawn nicely with the substrate. STEP 5: Stuff your Buckets. Stuff your buckets. Make sure to leave a little breathing room for the oyster mushrooms, water, and place a lid on to keep things moist. Store out of direct sunlight. STEP 6: Water once a week. Water as needed to keep the media from becoming dry and hard. While our cover crops, compost and MicroLife fertilizer break down in our teaching beds outside, it's time to sketch our plan, then start seeds + make our plant list for Annual Spring Plant Sale. For years, we've demonstrated Square Foot Gardening in our teaching beds at Zilker Botanical. They're both picturesque and great conversation starters for visitors. Since I'm planning one now for Spring, Angel & I (Madelynn) thought this would be a good opportunity to bring our local and online community together! We'll share our planning steps, our published plan from the Farmer's Almanac Garden Planner. Then the really fun part- the steps we take to plant, tend and harvest. We'll be available to answer your questions on our social media channels. Stay tuned for more installments through the growing season!
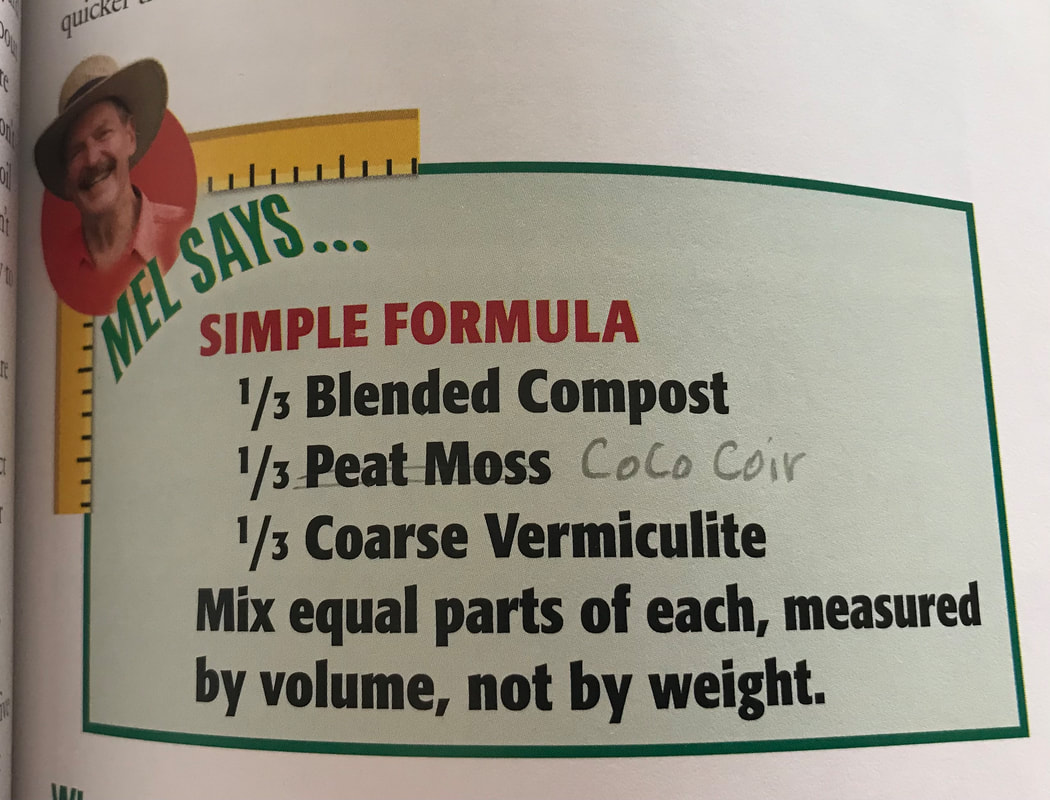
 Mel Bartholomew's Square Foot Gardening book was introduced decades ago. It was a PBS television series too so there's loads of information out there. Steps in Planning our Spring 5' x 5' Garden:
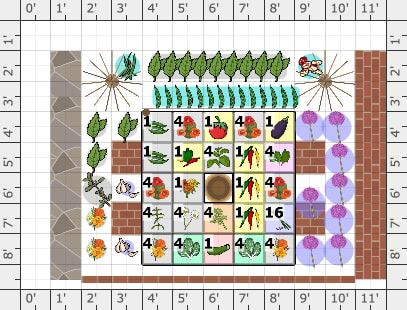
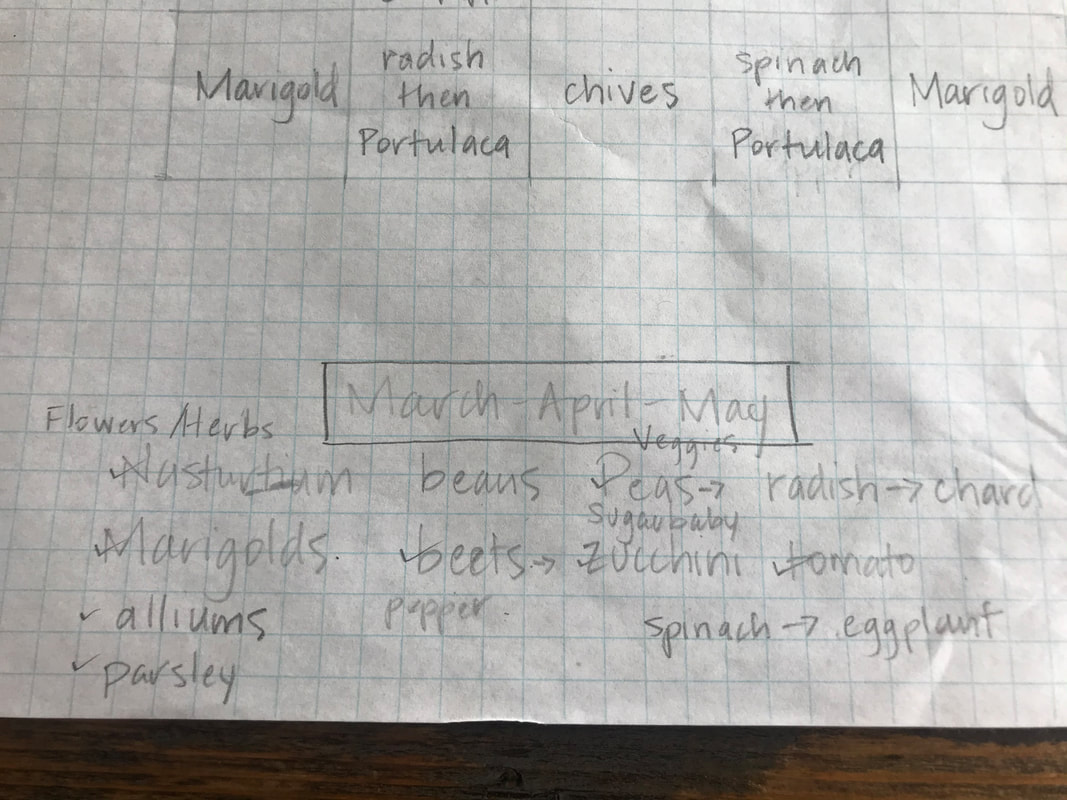
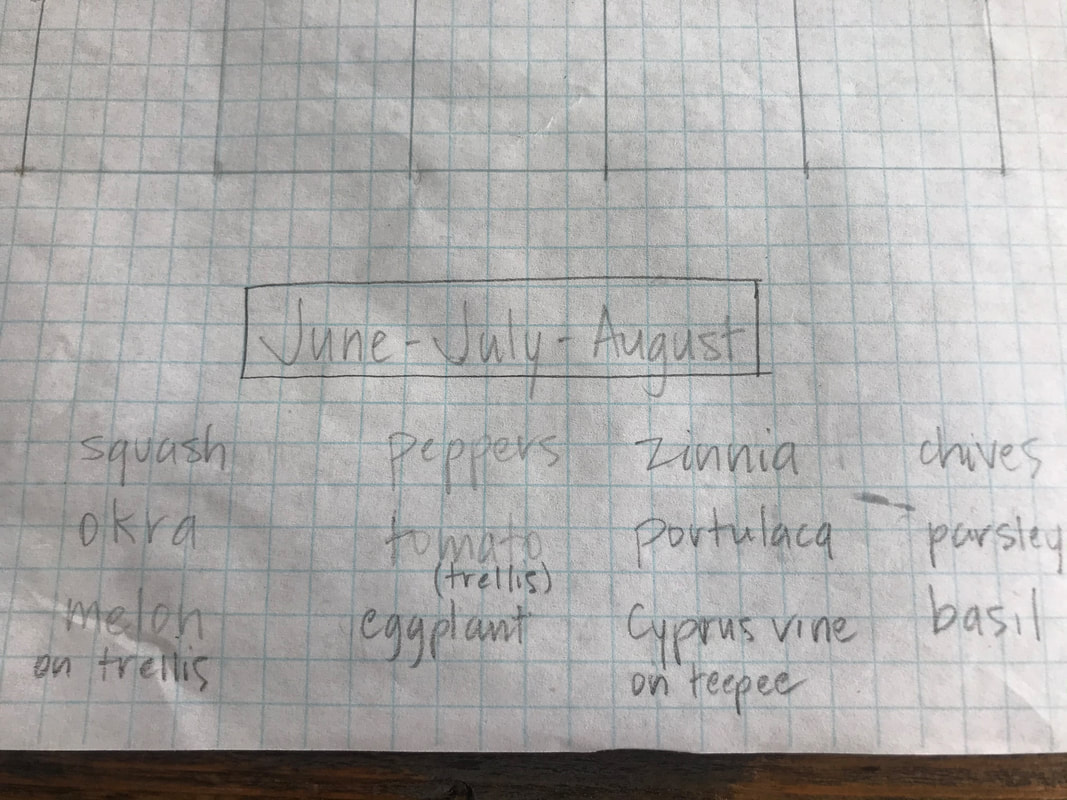
Voila! Here's a first draft of our plan! You'll see that some squares say "____ then ____". We'll grow an early crop and then plant a heat loving crop in May. Some plants like okra, will grow fast and require warm soil temps to germinate so we can grow an early season crop in this square then a warm season crop afterwards. As a quick recap, we've already prepped our soil using several methods:
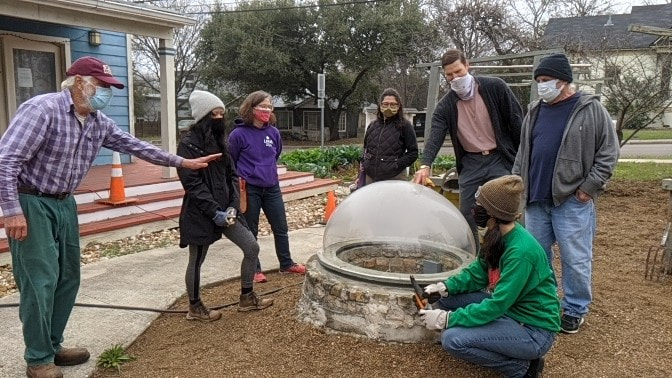
This past Saturday, the AOG volunteer crew met with longtime AOG member David Kramer at the Blackland neighborhood community project. He gave us a tour of the community project that started in the '80s to stop UT's expansion into East Austin. The project has incorporated veggie garden spaces in traffic circles and in water saving, raised wicking beds. We couldn't help but feel the energy coming from 1850's cistern well that has a newly functioning pump. The orb-like cover felt like we were seeing into the future and thankfully it has nothing to do with a middle eastern monarchy.
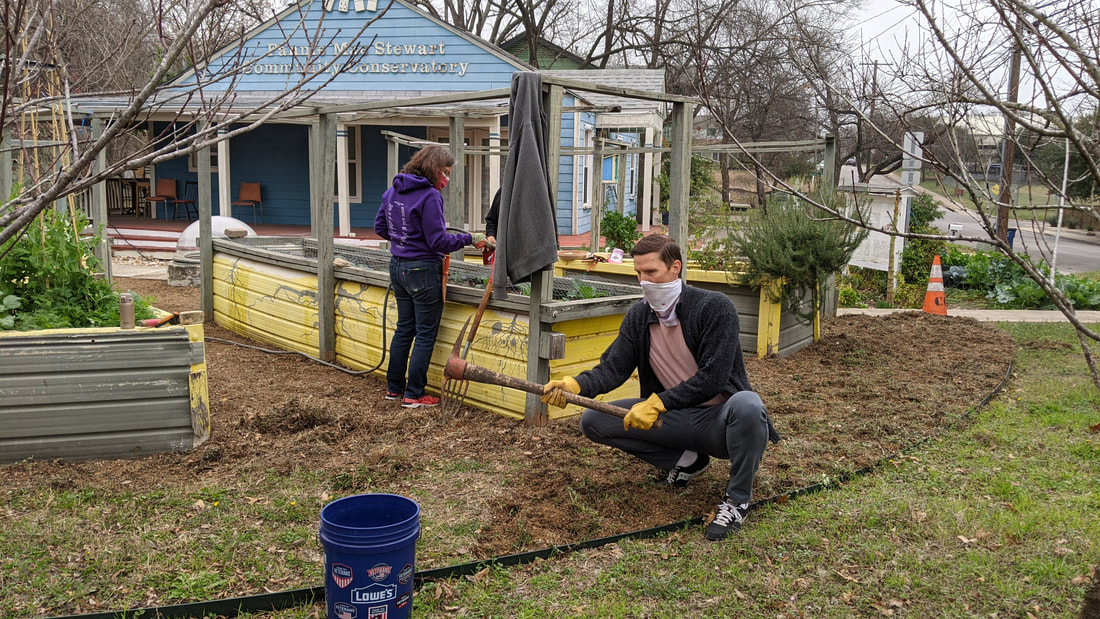
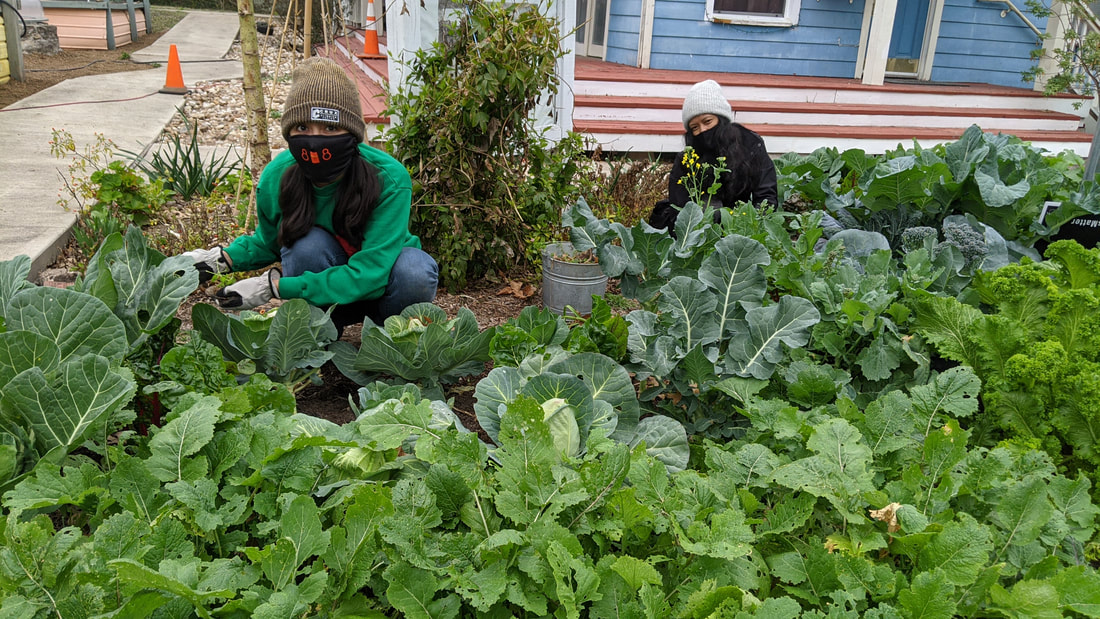
According to moon calendars, this time of the month in not great for planting. So instead we helped out with general maintenance, weeding, watering, thinning, and bringing the decomposed granite pathways back to their original Bermuda grass free state. Good job with the pitchfork Johnny! You can learn more about volunteering with Blackland community project here. In traditional straw bale gardening, bales are “conditioned” by adding nitrogen-rich compost or manure to the bale to provide nutrients and initiate decomposition while growing veggies. You can use mushroom grain spawn in a similar way, and the fungi will facilitate the faster breakdown of the straw while growing mushrooms. TIP: Be sure to use straw, not hay because the seeds will sprout and become weeds. LOCATION You'll want to place your straw bale in a shady spot that is protected from wind, and is within reach of a garden hose. MATERIALS NEEDED
GET MUSHROOM SPAWN FOR FREE Many times mushroom farms have used sawdust blocks that have grown mushrooms once, and then end up getting tossed in the waste stream. Check with your local mushroom farm to see if you can help them reduce waste and use the spawn in your organic garden. If you are in Austin, Central Texas Mycological Society is collaborating with a new local mushroom farms to help keep used mushroom blocks out of the waste and help get them into gardens around Austin and building more soil! The mushroom blocks are for free but you can also support our mission by becoming a member. STEPS
 By Madelynn Arnold It’s a critical time for Spring garden planning and AOG is gearing up to host our annual Plant Sale on 21st March! Our dedicated Saturday group met safely around picnic tables this morning to talk seed starting, share tips and share seeds! Like the beginning of each month, we started by checking our trusty local sources, most available on our website.
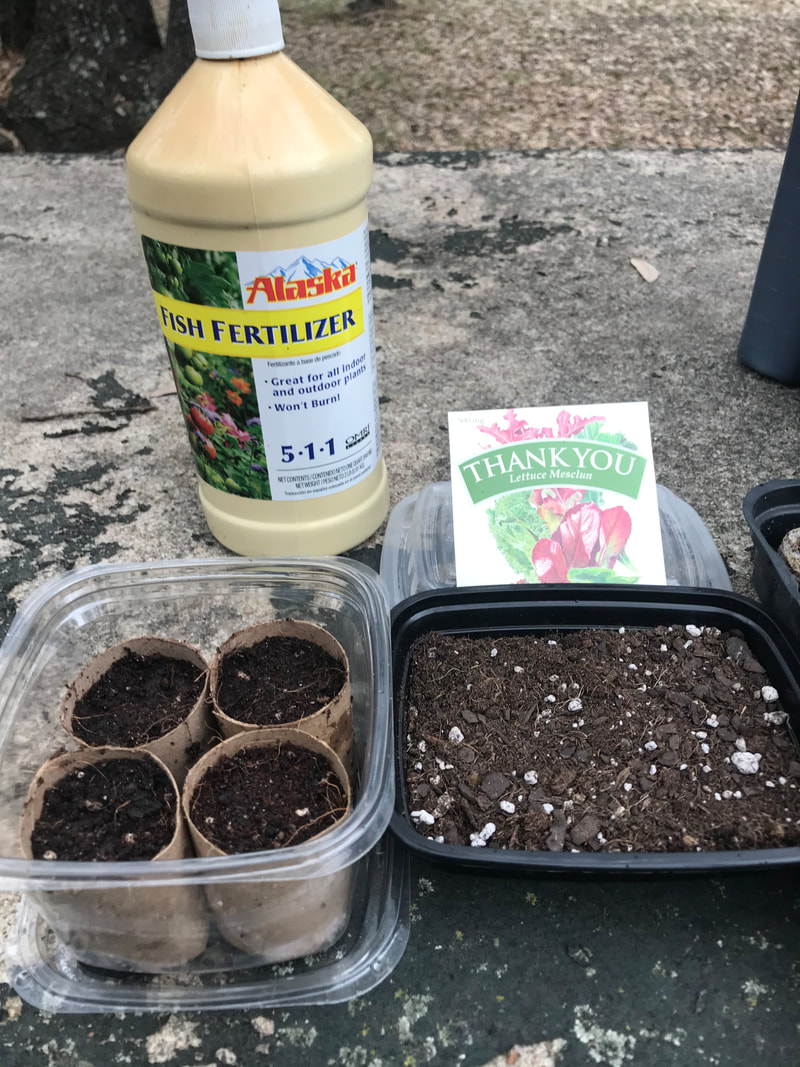
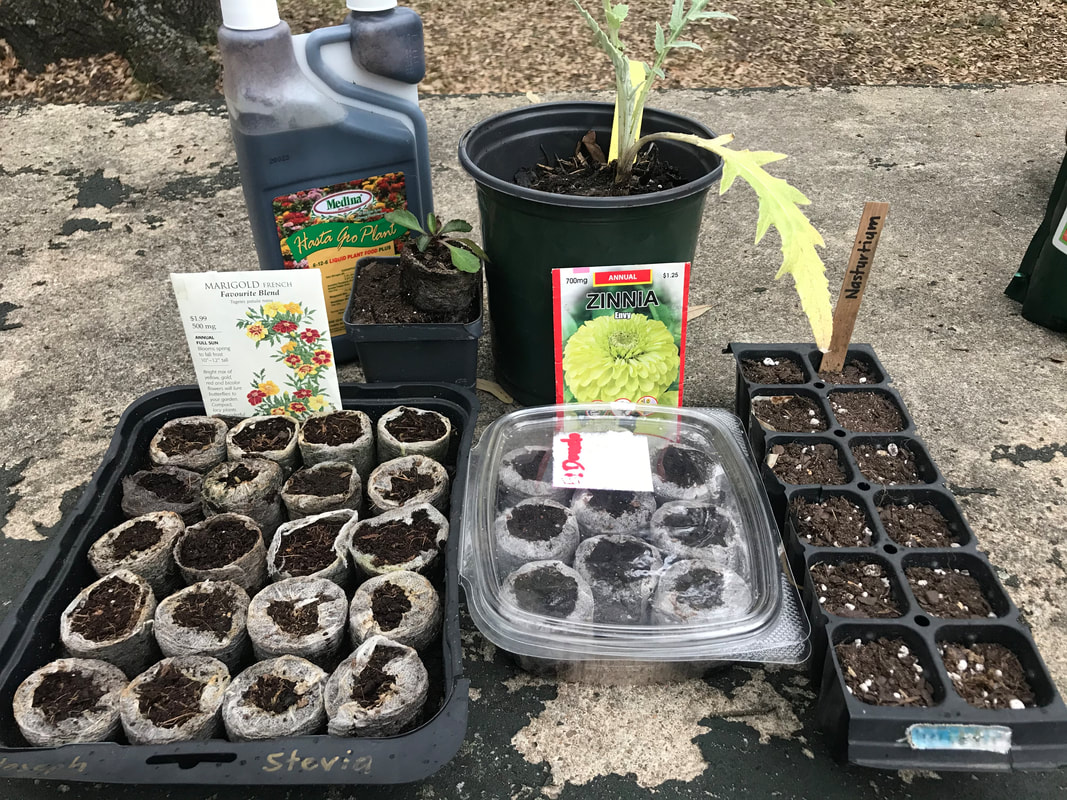
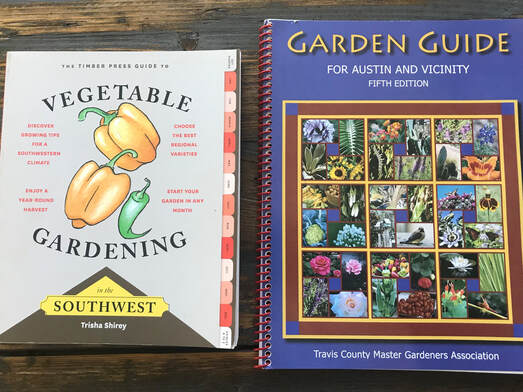
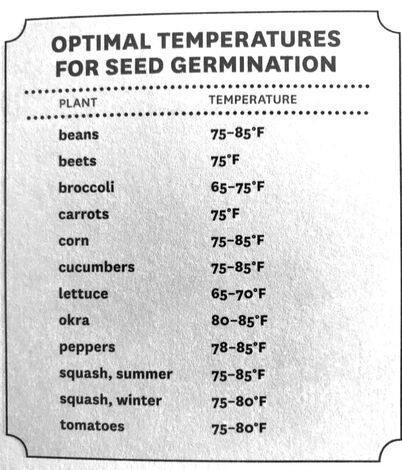 I also wanted to share this chart in Trisha Shirey’s book on the temps required for germination: Some plants, like our beloved tomatoes, require warm temps to get started. If you’re starting tomatoes, peppers, eggplants now, you’ll need a germination mat to warm soil temps under the seed trays + 6-8 hours of “sun” from grow lights above seed trays. After selecting Spring crops, read your seed packets- before and after purchasing! We looked at the seed packet information for Bloomsdale Spinach and Evergreen Hardy White scallions/bunching onions. Direct sow is recommended for both, saving precious space under grow lights. In the Fall, we look for “Frost Tolerant” varieties and in the Spring look for “Heat Tolerant” or “Slow Bolt” varieties- especially for cilantro and lettuces. I brought examples for three methods that I’ve found successful. Don’t skip using a fresh potting soil or mix your own. John Dromgoole recommends equal parts of Earthworm castings + Dairy manure compost + granite sand. We’re also liking the Ocean Forest Potting Mix from Fox Farm that Erin H. recommended. See Episode 16 from Fall on our website or YouTube channel.
When you see several sets of leaves, you’ll need to transplant seedlings to a 4” pot. As plants grow larger, check charts for the correct window for planting transplants outdoors. If it’s too early, especially for tomatoes, you have two options:
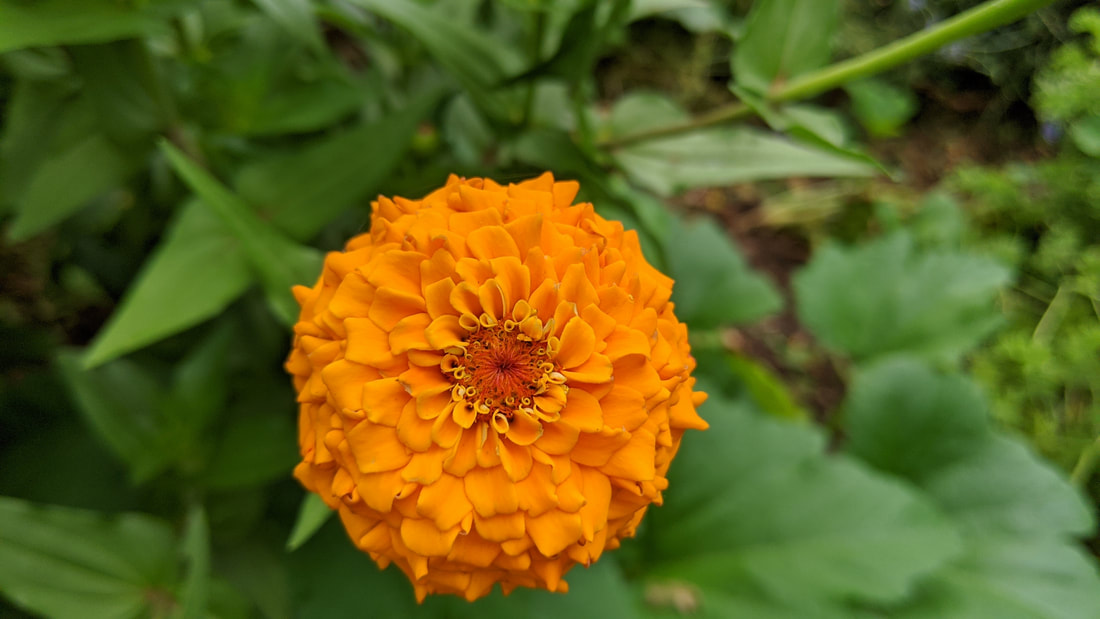
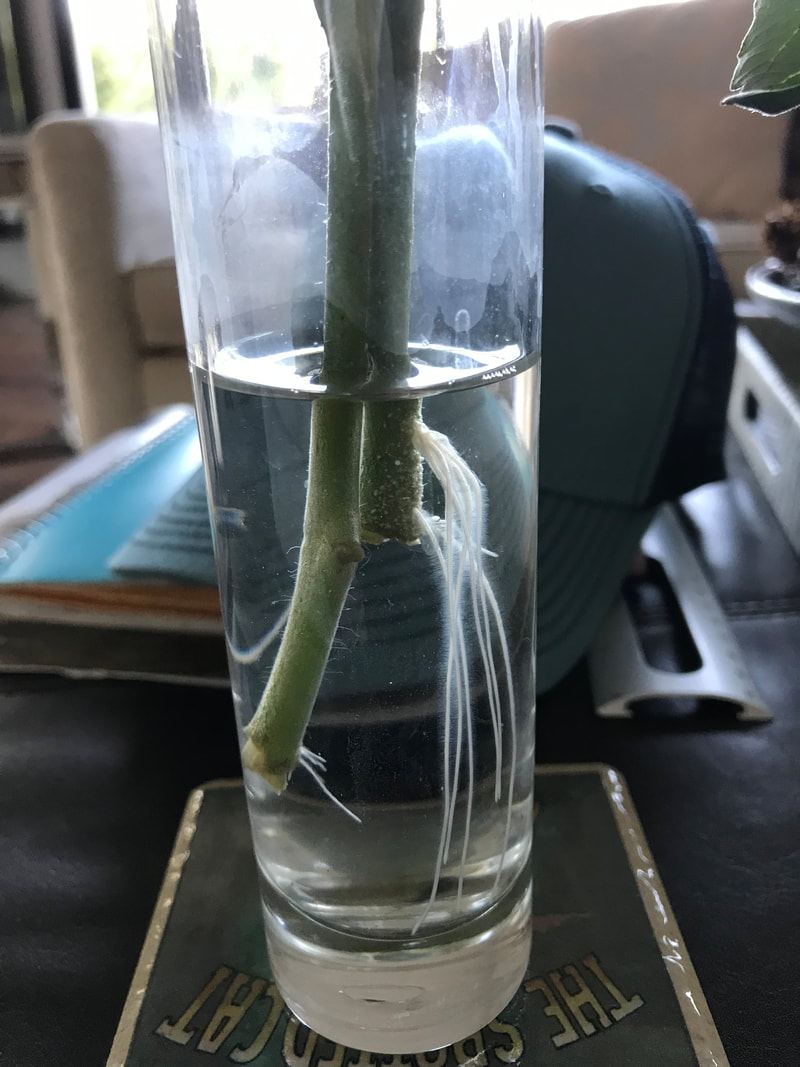
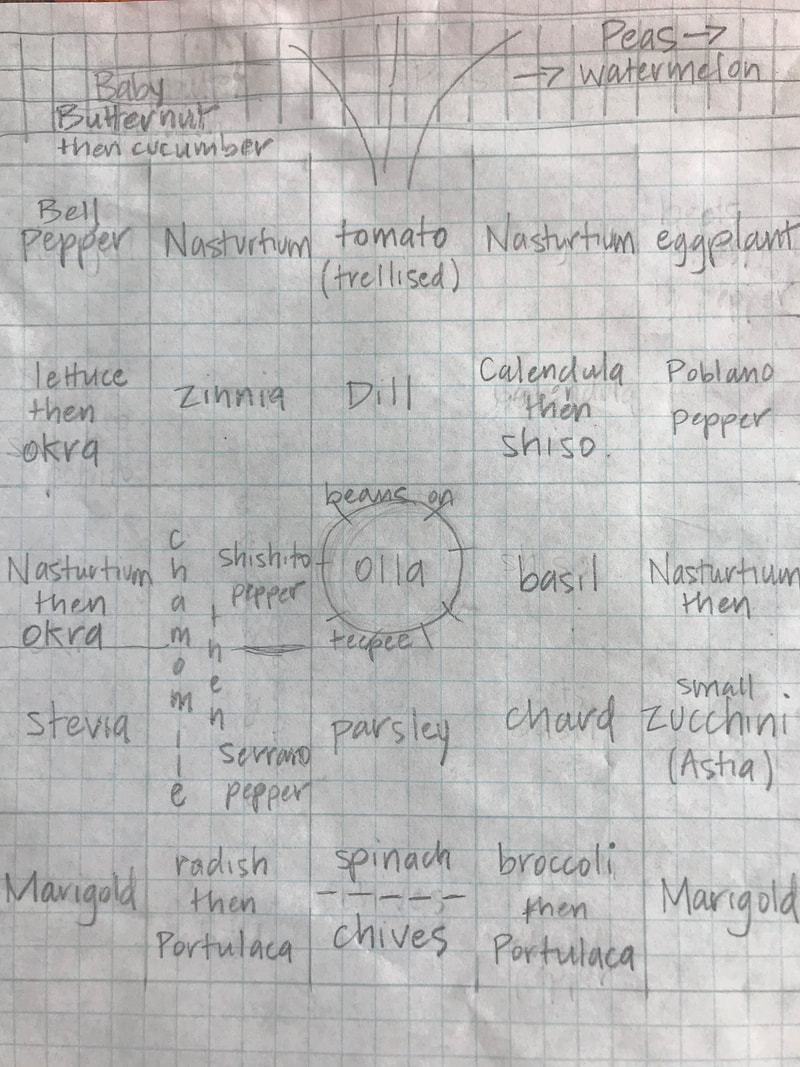
This time of year, I start Marigolds and Nasturtiums in seed trays. Even though I haven’t settled on vegetables for our Square Foot design for Spring, these two are standard companion plants for organic pest control. Both are low growing so good to plant on the edges as they won’t block the sun for larger veggies. Marigolds have a strong scent repelling insects above ground and Nasturtiums repel nematodes in the soil. Both are edible too (petals on Marigolds, leaves + petals on Nasturtiums)! Nasturtiums are susceptible to frost so they’ll require protection after planting. A good reminder too came from Sarah S., that some spring and summer plants are easily propagated now vs. starting over from seed. You can root the tips of tomatoes and 4” pieces of tropical milkweed (cut above a node) in a jar of water. Cut all leaves below water level and keep water fresh. Plant in potting soil in a 4” pot when roots are visible. Others, like bunching onions, can be divided now. 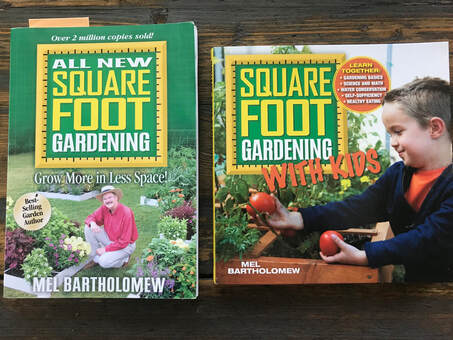 Looking towards our Spring Video series, we’ll be growing a 5’x5’ Square Foot Garden with an olla in the center. We’ll reveal a plan at our February AOG meeting. You’re invited to grow along with us or amend the plan to suit your salad bowl and growing experience. You may want to source a 2 gallon Dripping Springs Olla early. While there’s loads of information online at squarefootgardening.org you might like to have these books at hand to learn more about this growing method. It features high density planting to shade out weeds and increase productivity in small spaces. Your neighbors, coworkers and parents might remember the PBS show or have tips to share. Invite them to seed/plant share and join us. We’re hoping this will be a fun way to bring our online community together as we grow a similar set of veggies, herbs and flowers this spring! We look forward to planting our display garden at Zilker Botanical Gardens in the Pioneer Village on future workdays. Keep an eye out for our posts and progress updates. Happy planning and seed starting!
With kind regards, Madelynn |
AuthorWrite something about yourself. No need to be fancy, just an overview. Archives
May 2024
Categories |


 RSS Feed